Client Portal
Give your customers a branded, public-facing page to submit support requests and browse your knowledge base — no login required.
What is the Client Portal?
The Client Portal is a public webpage that belongs to your organization, hosted at a URL like yourcompany.fynedesk.io. Your customers visit this page to submit support requests or find answers in your knowledge base — without needing a FyneDesk account.
Every request submitted through the portal becomes a ticket in your FyneDesk queue, just like tickets created manually or via email. Your team handles them the same way.
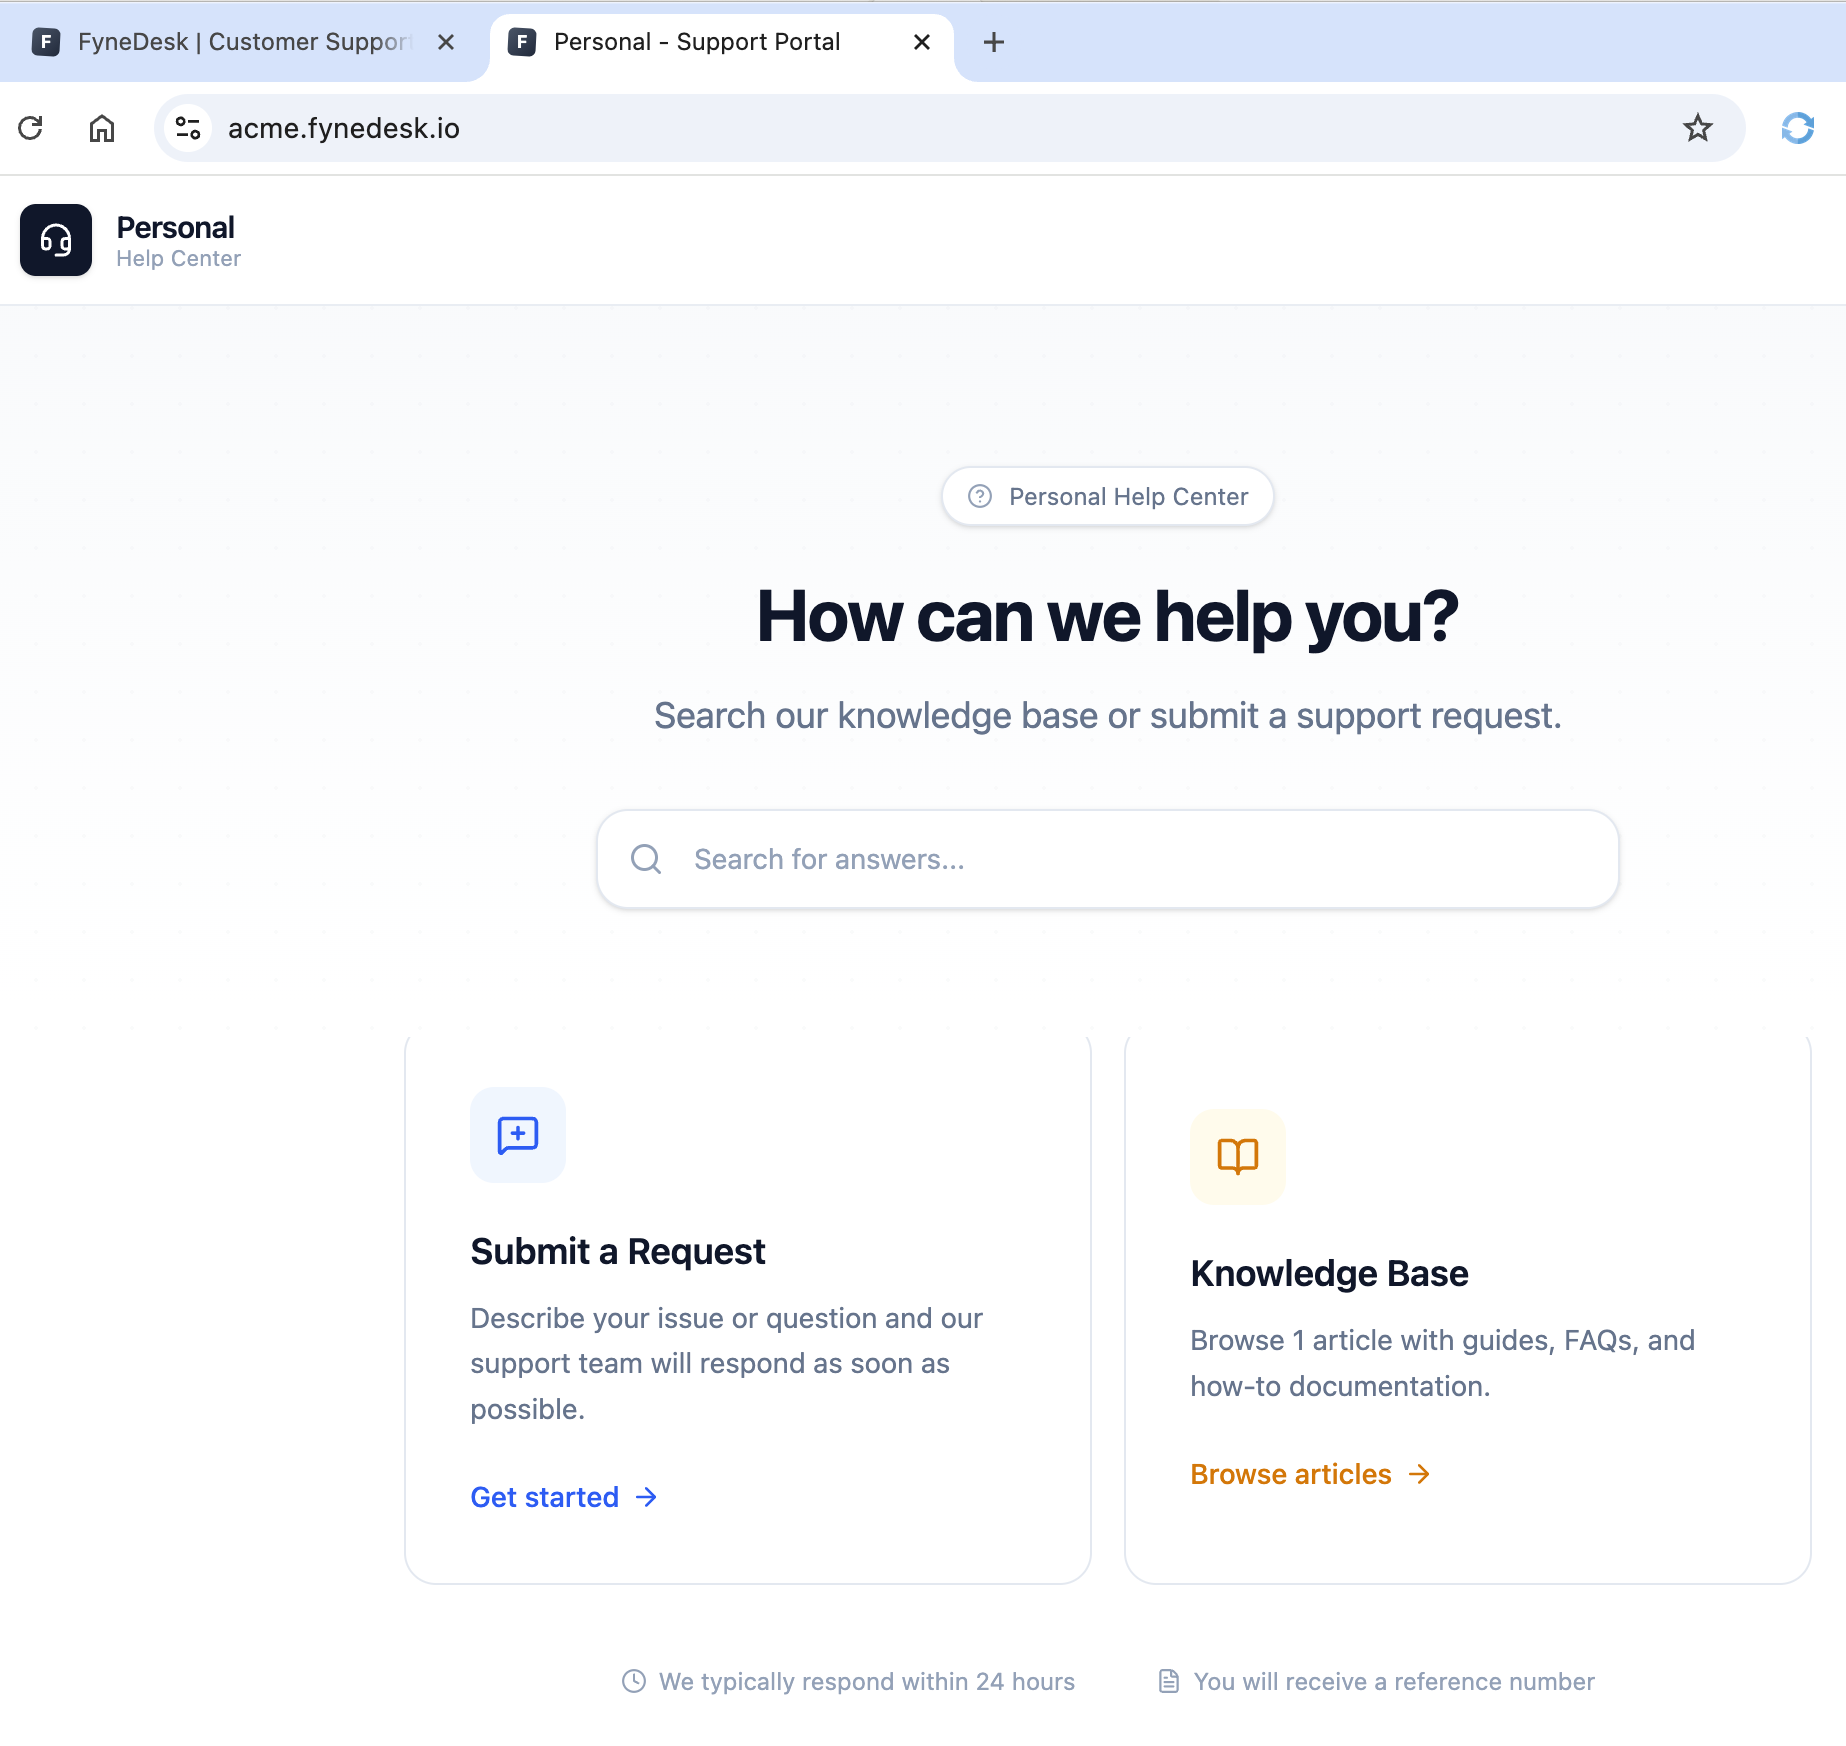
What your customers see
When a customer visits your portal, they see a simple page with your organization name, a form to submit a request, and optionally your published knowledge base articles. There is no login wall — anyone with the link can use it.
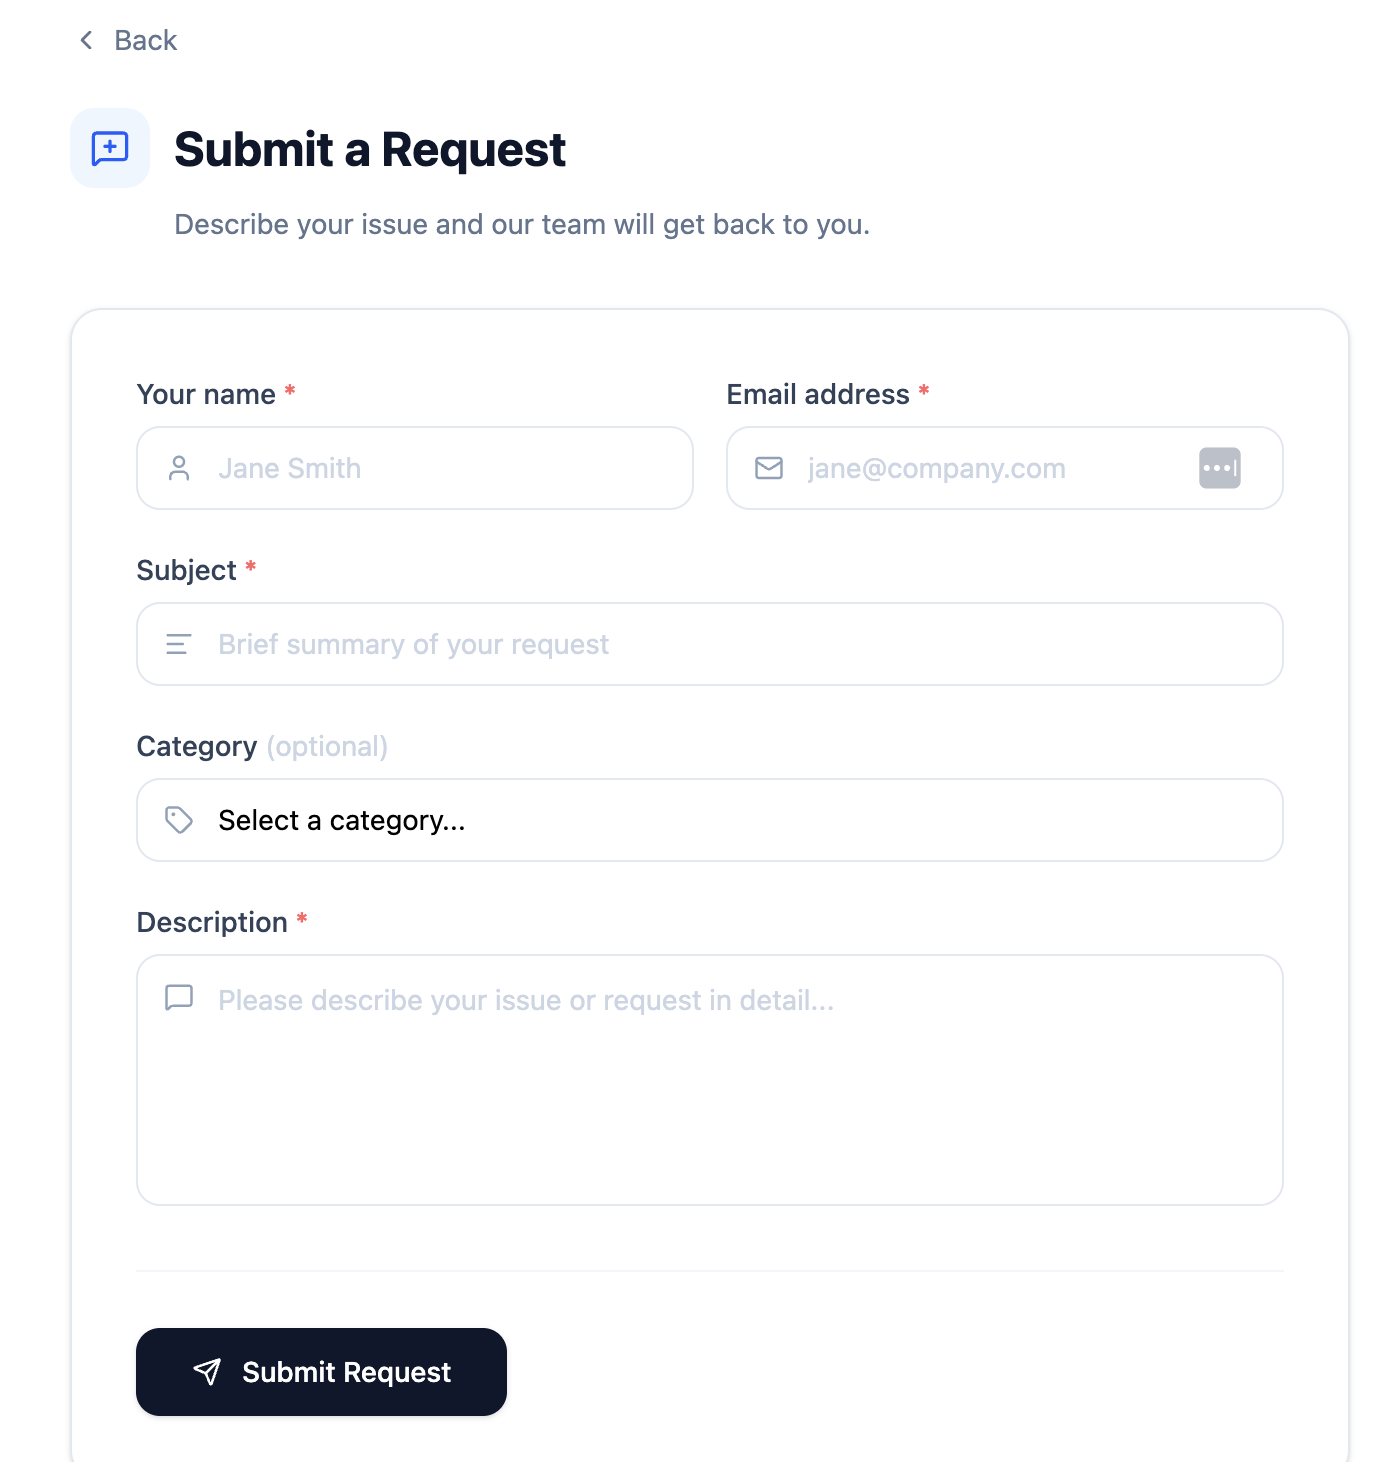
The submission form asks for:
- Their name and email address
- A subject (ticket title)
- A description of their request
Once submitted, the customer sees a confirmation message and the ticket appears in your FyneDesk queue.
Setting up the Client Portal
You need to be an Admin to configure the portal. Go to Settings → Client Portal in your FyneDesk app.
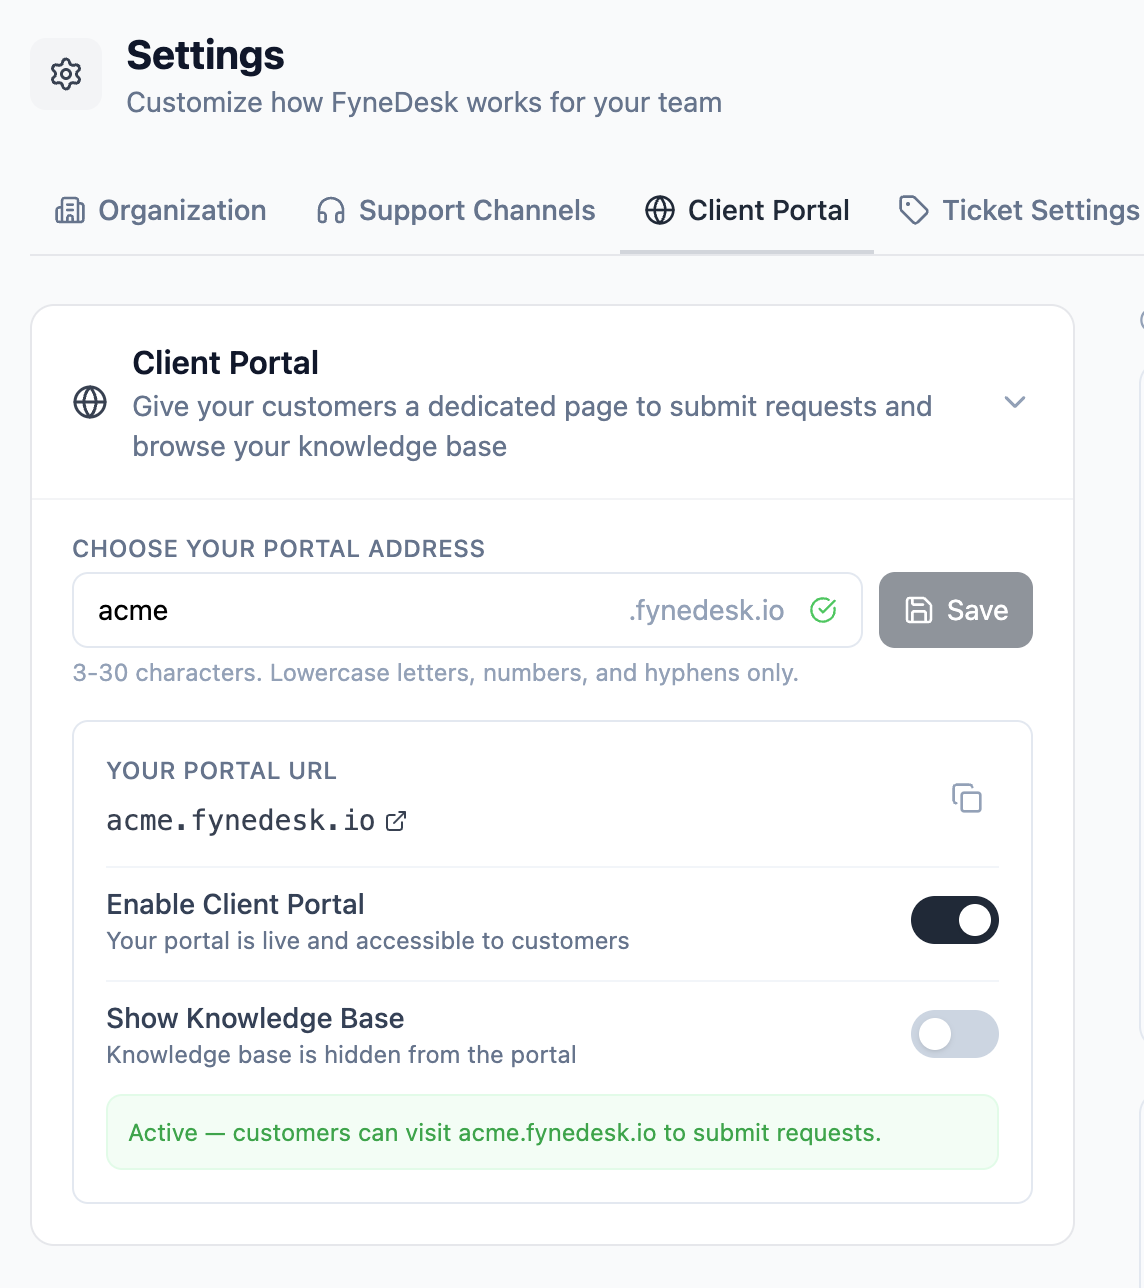
- 1 Type a short name for your organization in the portal address field. This becomes your portal URL. For example,
acmegives youacme.fynedesk.io. Use lowercase letters, numbers, and hyphens only. - 2 Click Save. FyneDesk checks if the name is available and reserves it for your organization.
- 3 Once saved, flip the Enable Client Portal toggle on to make the portal publicly accessible. You can toggle it off at any time to take it offline without losing your address.
acme or acme-support works better than something long or random.
Enabling the Knowledge Base on your portal
If you have published articles in your FyneDesk knowledge base, you can display them on the portal so customers can find answers before submitting a request.
In Settings → Client Portal, toggle Show Knowledge Base on. Only published articles will appear — drafts stay hidden. You can turn this off at any time if you want a submission-only portal.
Sharing your portal with customers
Once the portal is enabled, share the URL with your customers. Good places to put it:
- Your website's contact or support page
- Email signatures
- Invoices or receipts
- A pinned post in any customer community or chat
Disabling the portal
Go to Settings → Client Portal and flip the Enable Client Portal toggle off. The portal URL will stop working immediately and show a "not found" page. Your portal address is preserved — enable it again anytime to bring it back.
Portal branding
You can customize the look of your portal with a color theme, your organization's logo, and a hero image. These settings are in Settings → Client Portal under the Portal Branding section, which appears after you save your portal address.
Choosing a portal theme
FyneDesk offers three built-in portal themes. Each theme changes the color palette across the entire portal, including the hero gradient, header and footer styling, buttons, links, and card hover states.
- Classic — clean blue and slate. The standard FyneDesk look.
- Warmth — warm amber and forest green. Inviting and approachable.
- Forest — deep green and navy. Calm and professional.
Each theme card shows color swatches and a mini preview. Click a theme to apply it. The change saves immediately and is reflected on your live portal right away.
Uploading a logo
Your logo appears in the portal header and footer. In the Portal Branding section, find the Logo area and upload an image file. Accepted formats are PNG, JPG, WEBP, and SVG, with a maximum size of 2 MB. A square or landscape format works best.
To remove your logo and revert to the default icon, click the remove button next to the current logo preview.
Uploading a hero image
The hero image appears as a banner in the landing section of your portal, above the ticket submission area and knowledge base. In the Portal Branding section, find the Hero Image area and upload an image file. Accepted formats are PNG, JPG, and WEBP, with a maximum size of 5 MB. A landscape format (16:9 or wider) is recommended.
To remove the hero image and revert to the text-only hero, click the remove button next to the current image preview.
Frequently asked questions
Can I customize the portal's appearance?
Yes. Go to Settings → Client Portal → Portal Branding to choose a color theme, upload your logo, and add a hero image. See the Portal branding section above for details.
Do customers need an account to use the portal?
No. Customers fill in their name and email on the form. There is no signup or login required.
Where do portal submissions appear in FyneDesk?
They appear in your regular ticket queue alongside all other tickets. You can filter by ticket source to identify portal submissions.
Can I change my portal address later?
Yes, but be careful — changing it breaks any existing bookmarks or links you've already shared. If you must change it, update anywhere you've published the old URL.